Candied Violets
Violets are gorgeous, cheap, and edible. They also only bloom once a year, so every year, I get really excited for violet season. For the past few years, I’ve been trying some different experiments with violets. Last year, I tried to make a violet syrup, and while it did look pretty, I thought it tasted a little weird. The year before… Well, I lived in the city and didn’t have access to violets. And the year before that was when I first “discovered” violets, and I made candied violets. They were a lot of work, but they’re really impressive, so I decided to try again this year.
I still need to improve my technique, so take everything with a grain of salt. If you try this out or have candied violets before, I’d love to hear your thoughts on what works best for you!
For one thing, I think this project would work better if it could be completed all in one day. Be aware, though, that it could easily be an all-day project in that case.
1. First, gather fresh violets. Try to get ones that you know haven’t been sprayed with any pesticides, herbicides, or other lawn chemicals. When you pick them, leave a few inches of stem on each one.
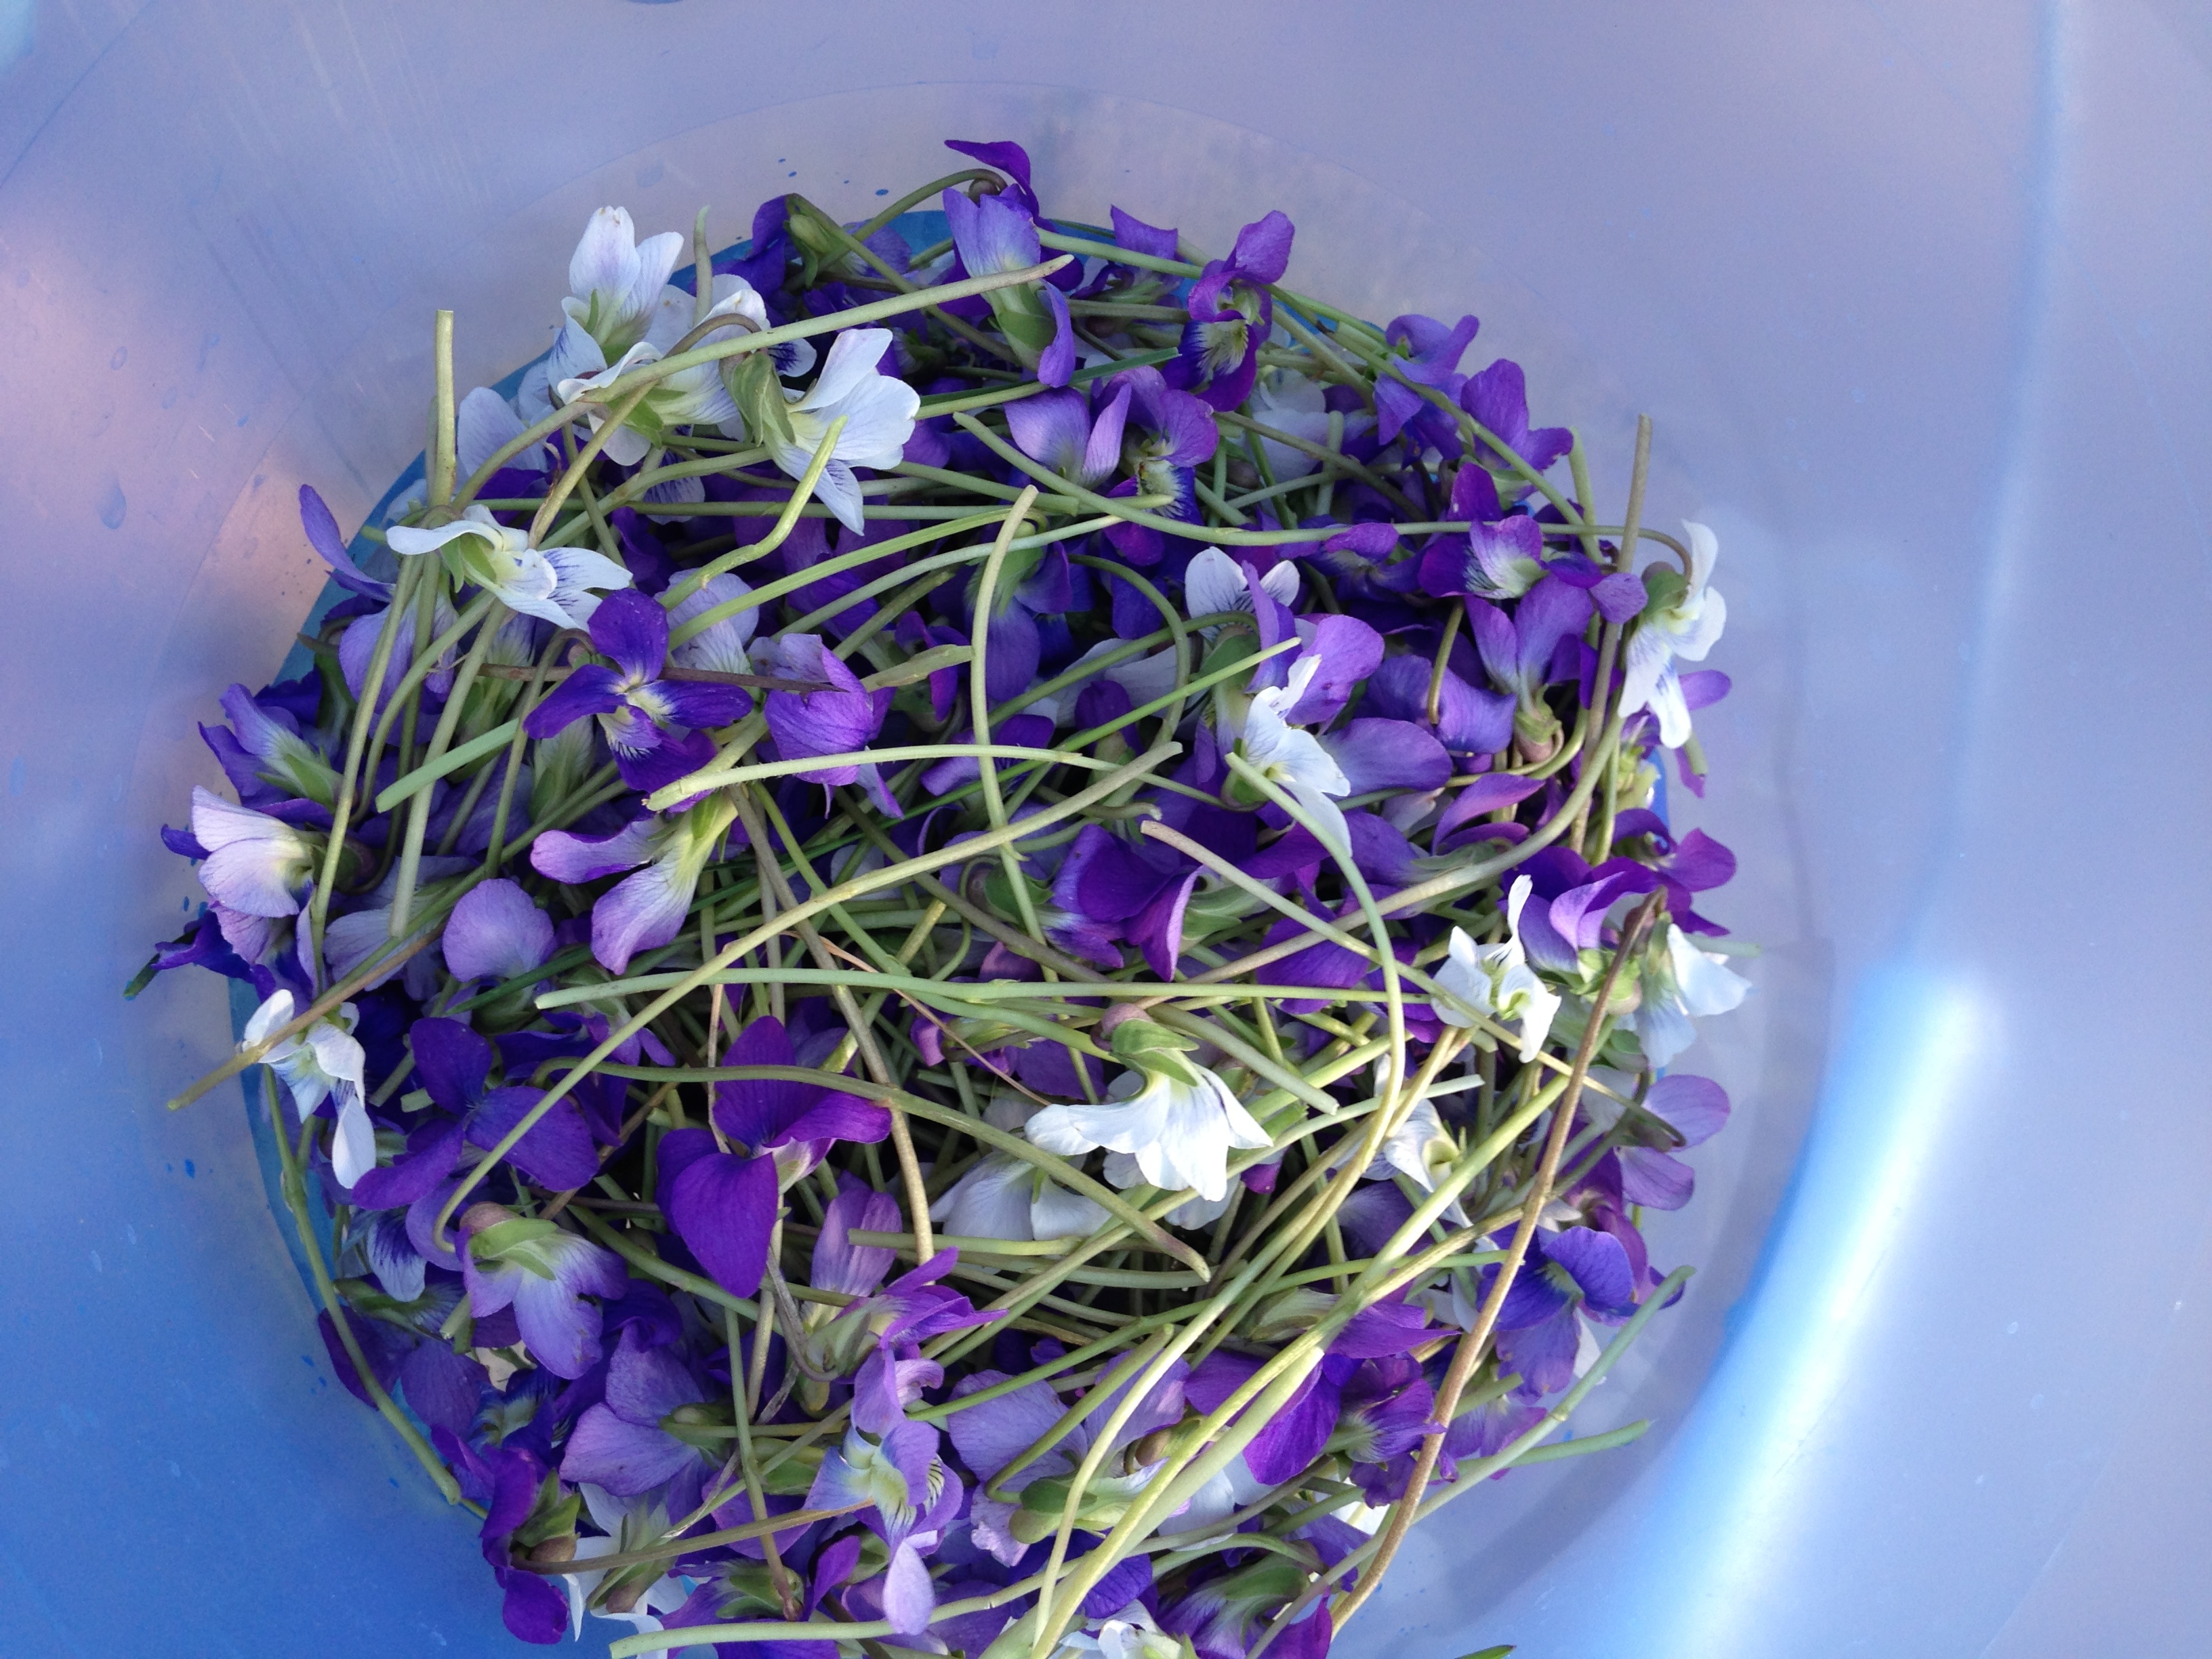
2. I think next you should wash the violets (i.e. rinse them gently, and then spread them on a paper towel to dry). I didn’t do this, and I did notice some dirt on a few of them later. What I did instead was spend too much time putting them in a bowl where all their stems could get to the water, and put them in the fridge to work on tomorrow (I was trying to do this project during the work week).
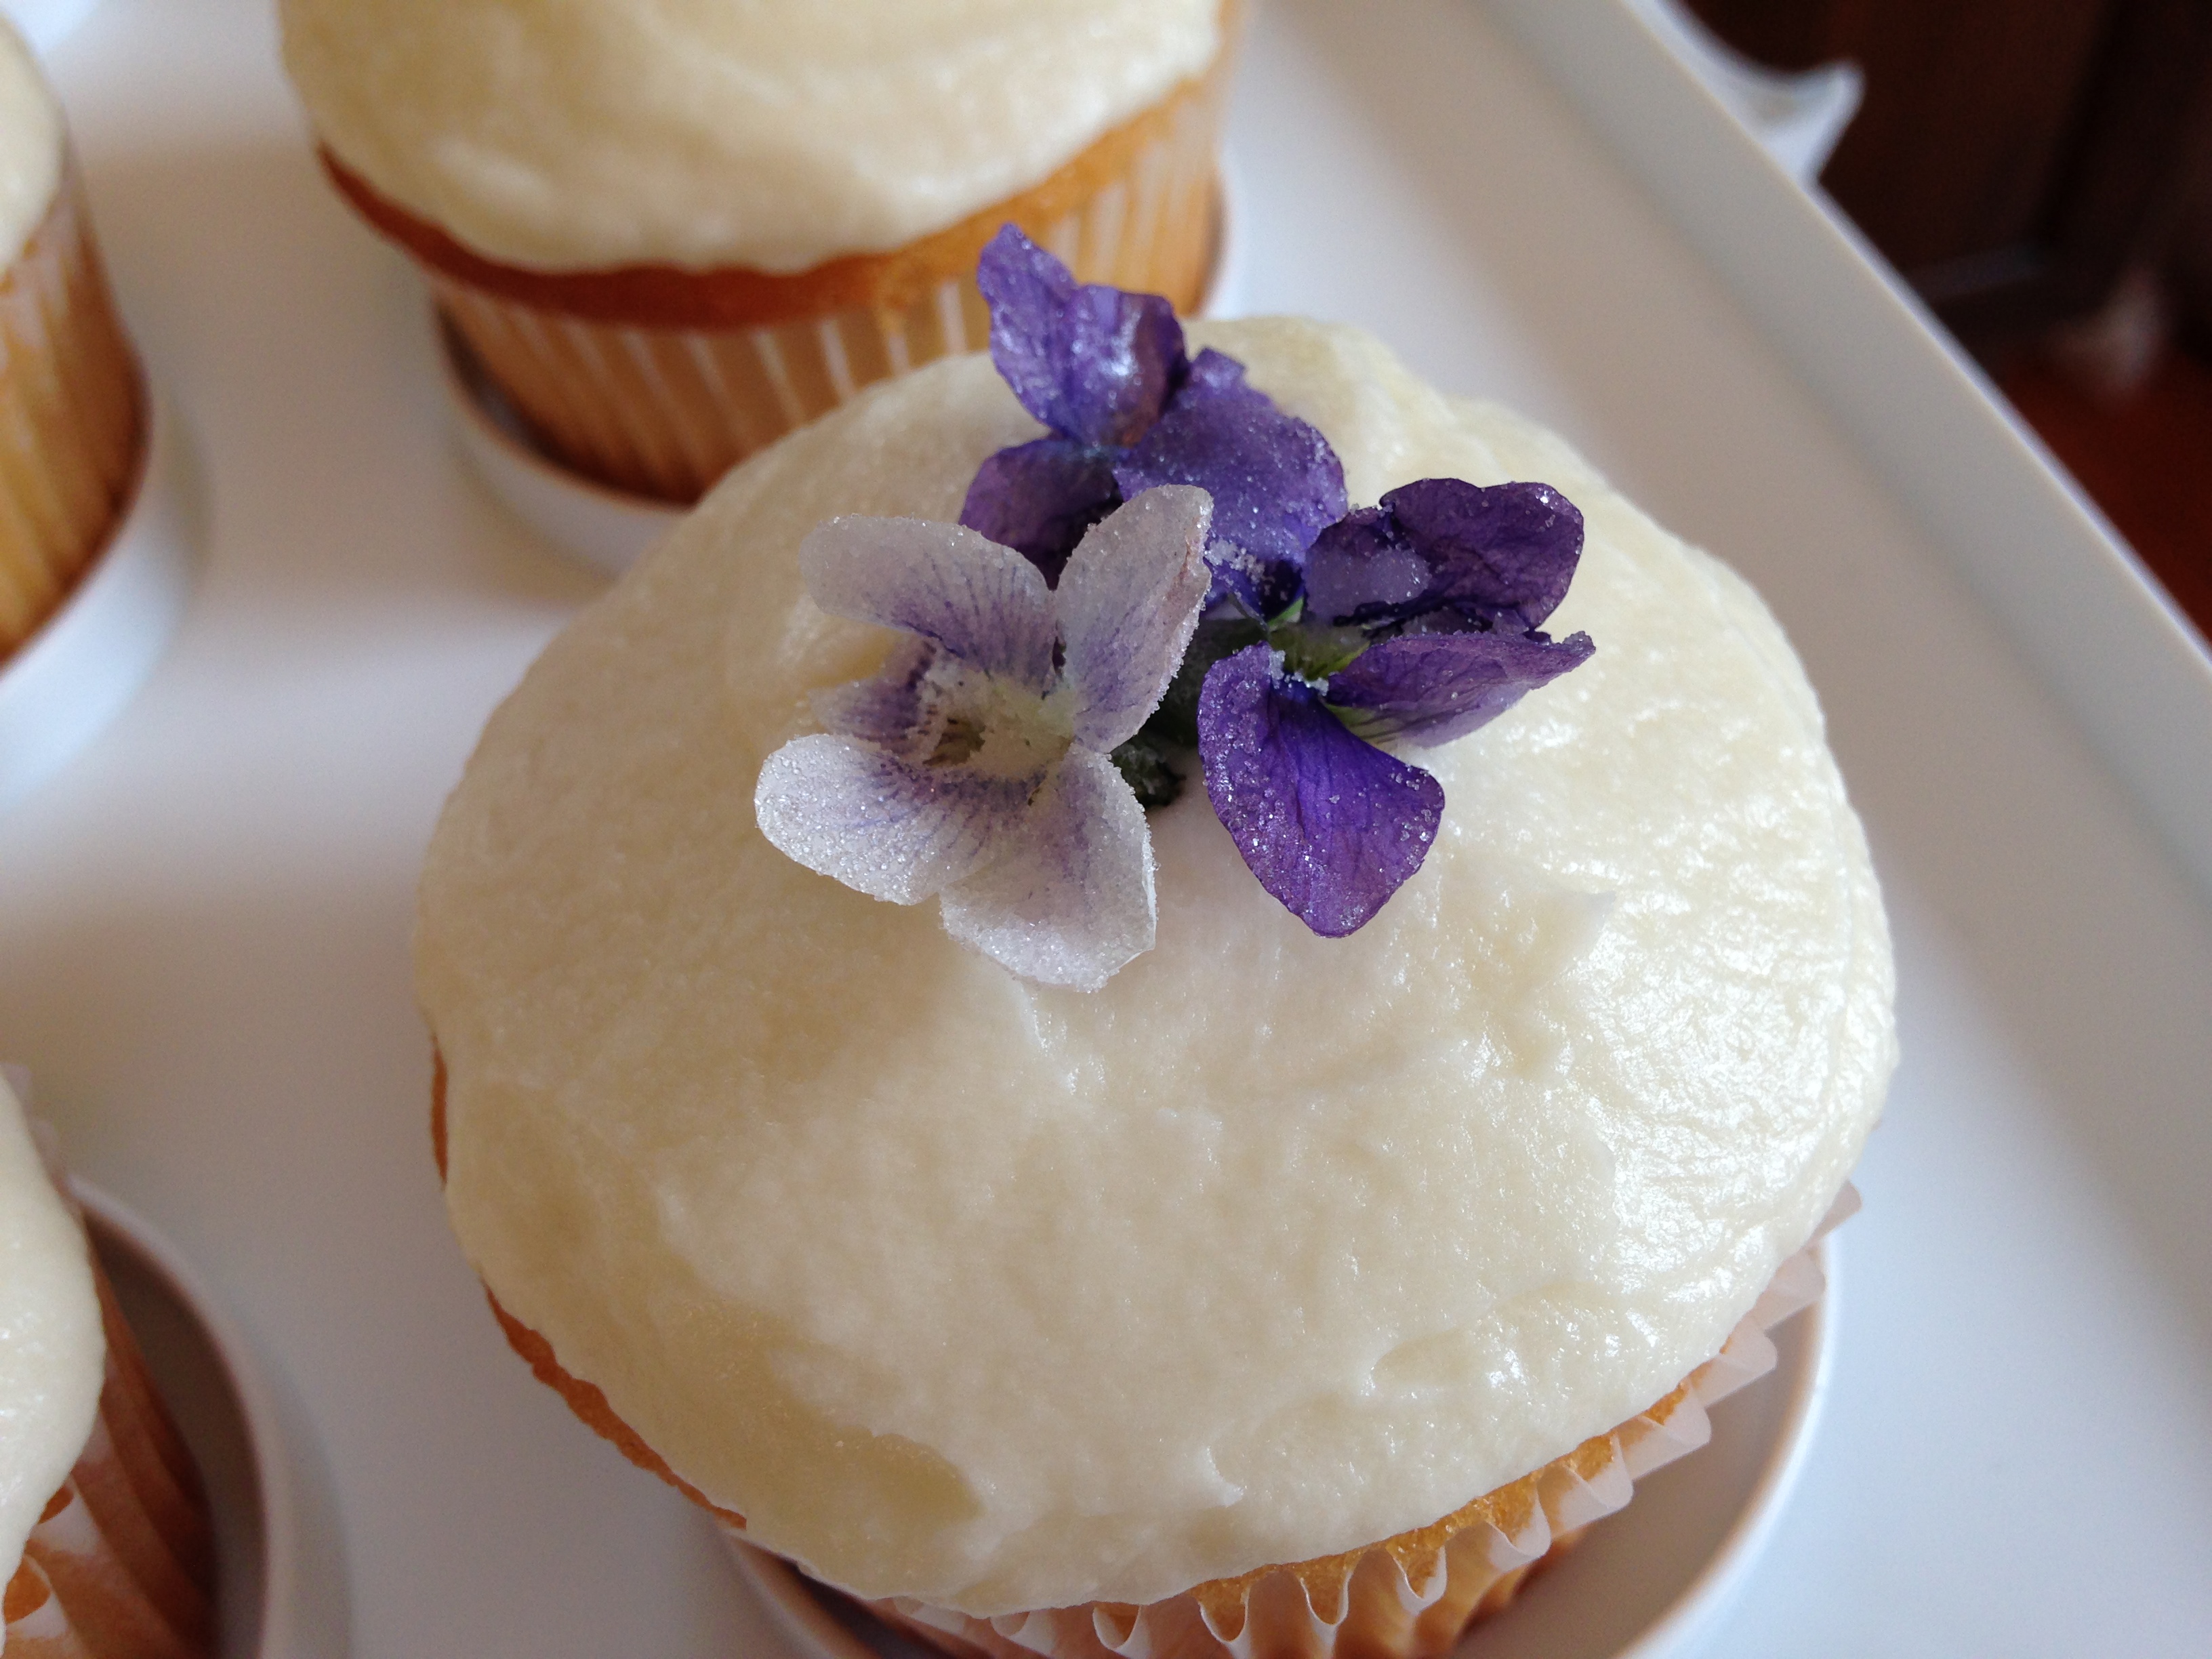
3. Once your violets are ready, make the syrup. I wanted to use some of my violets on cupcakes I was planning to sell, so I avoided the traditional egg white syrup recipes all over the internet, and chose a simple sugar syrup instead. If raw egg whites don’t scare you, though, I think that approach would be stickier and probably coat the blossoms better.
The ratio I used for my sugar syrup is borrowed from this WikiHow article, and is as follows: 1½ C water, 1 C plain white sugar, and a few drops or up to ¼ tsp flavoring (they suggest almond or rosewater, which are always good; I had violet flavoring on hand so I used that).
Making the syrup is easy. Put the water and sugar in a small saucepan and heat until the sugar dissolves (stirring helps). Add the flavoring.
4. Set up your work area. You will need a small bowl or saucer of sugar for sprinkling. The recipe said caster or superfine sugar; I am not sure it really makes a difference, and almost think I would prefer regular granulated sugar. The superfine sugar (which I did use) is more likely to clump. It’s possible, though, that once I get better at this process, the superfine sugar will turn out to be the better option. Or maybe it makes a difference whether you use egg whites or not? I don’t know.
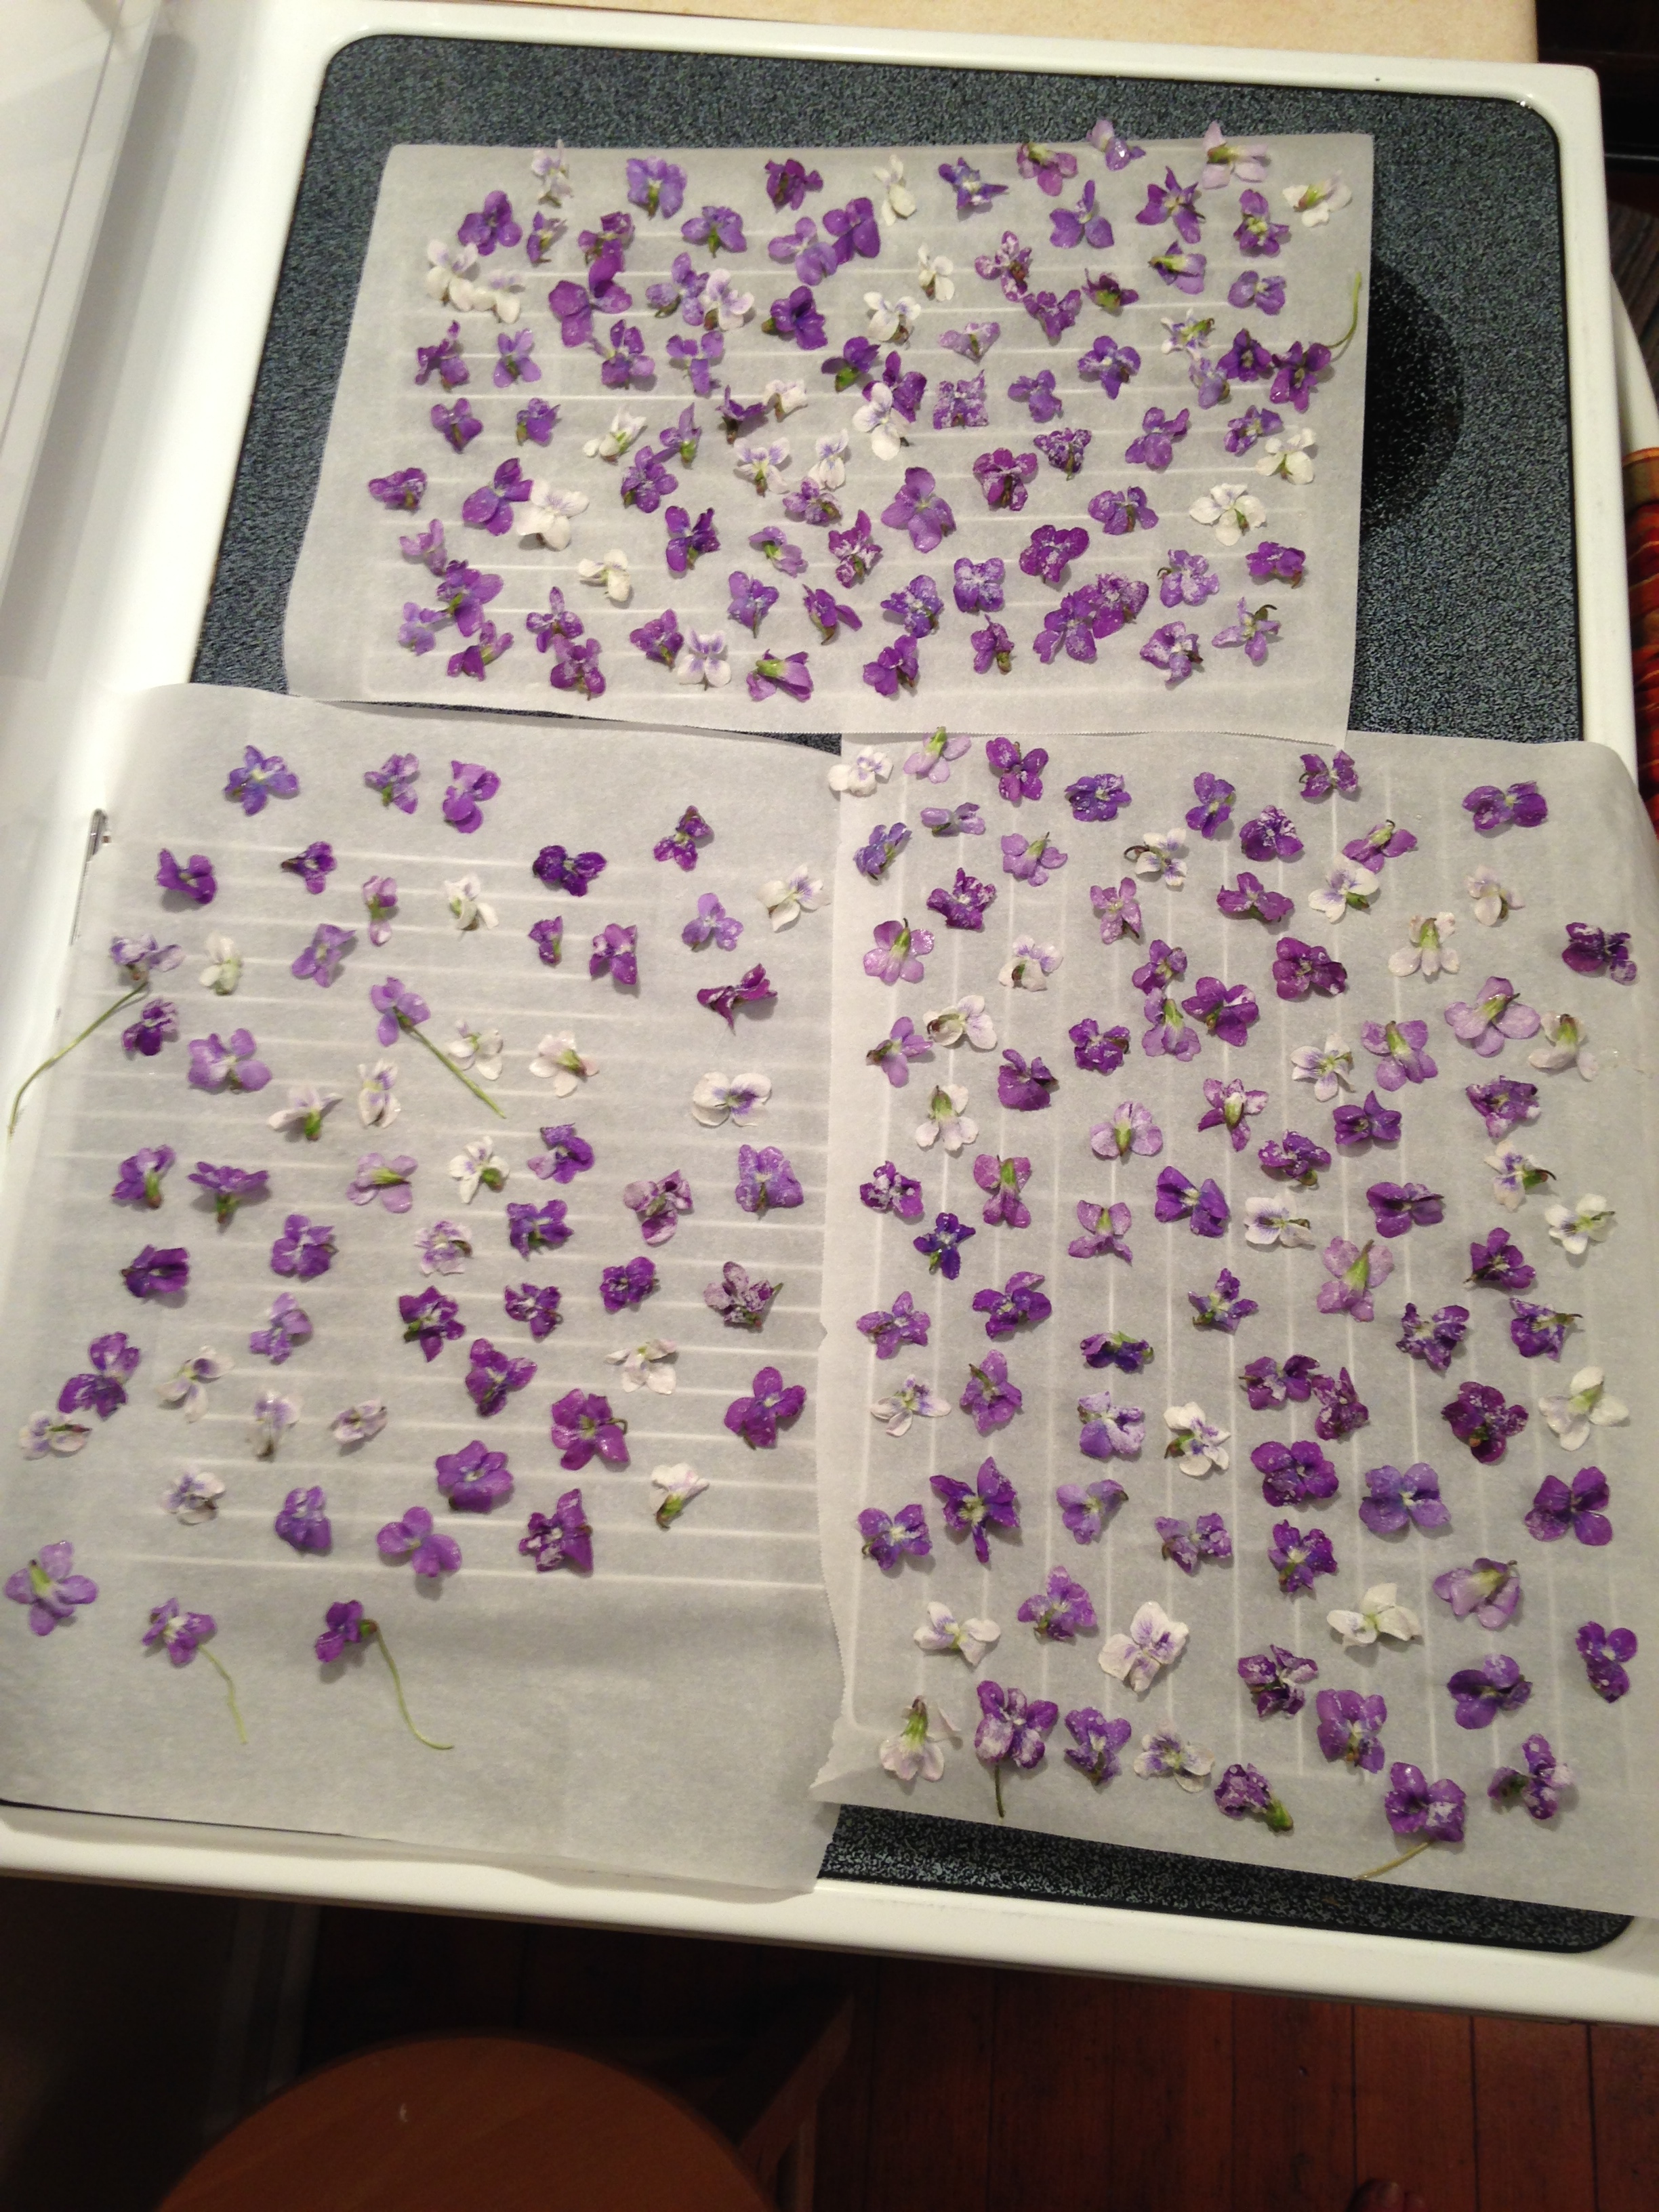
You also need a place to let the violets dry. They will need to dry overnight. I used a wire cooling rack (or three) covered with parchment paper. Use wax paper instead! It will work much better.
5. Now you are ready to start sugaring. Originally, I tried to paint the syrup on the violets with a small paintbrush and then dip them in sugar. Wrong (the syrup didn’t stick; wherever it did, the sugar clumped horribly). Next, I tried dipping the violets in the syrup, using the paintbrush to separate the petals (which stick together when submerged in syrup, of course), and then sprinkling the sugar over them. This worked somewhat better. Eventually, I got tired and developed what turned out to be a better method: I dipped the violets in the syrup, gave them a good shake over the sink to get rid of the excess, sprinkled them with sugar, and gave them another (gentler) shake to get any extra sugar off. It seemed the violets that weren’t sturdy enough to hold up to this method were not going to turn out looking nice anyway (by “sturdy” I mostly mean fresh; some of the violets were older or didn’t get enough water, and wilted quickly).
So, here’s my best method so far: Holding the stem close to the petals, dip the violet in syrup. Give the violet one or two vigorous shakes over the sink. Continue holding the violet by the stem with one hand and use a spoon to sprinkle sugar over the flower with your other hand. Make sure the sugar coats the petals but doesn’t clump; shake it off and re-sugar if it does.
6. Just before setting the violet down to dry, snip or twist off the stem as close to the base as possible. Then lay the violet on the waxed paper. They will harden as they dry, so it does matter how you set them down. I tried to lay them all facing up; otherwise, you get flattened-looking violets.

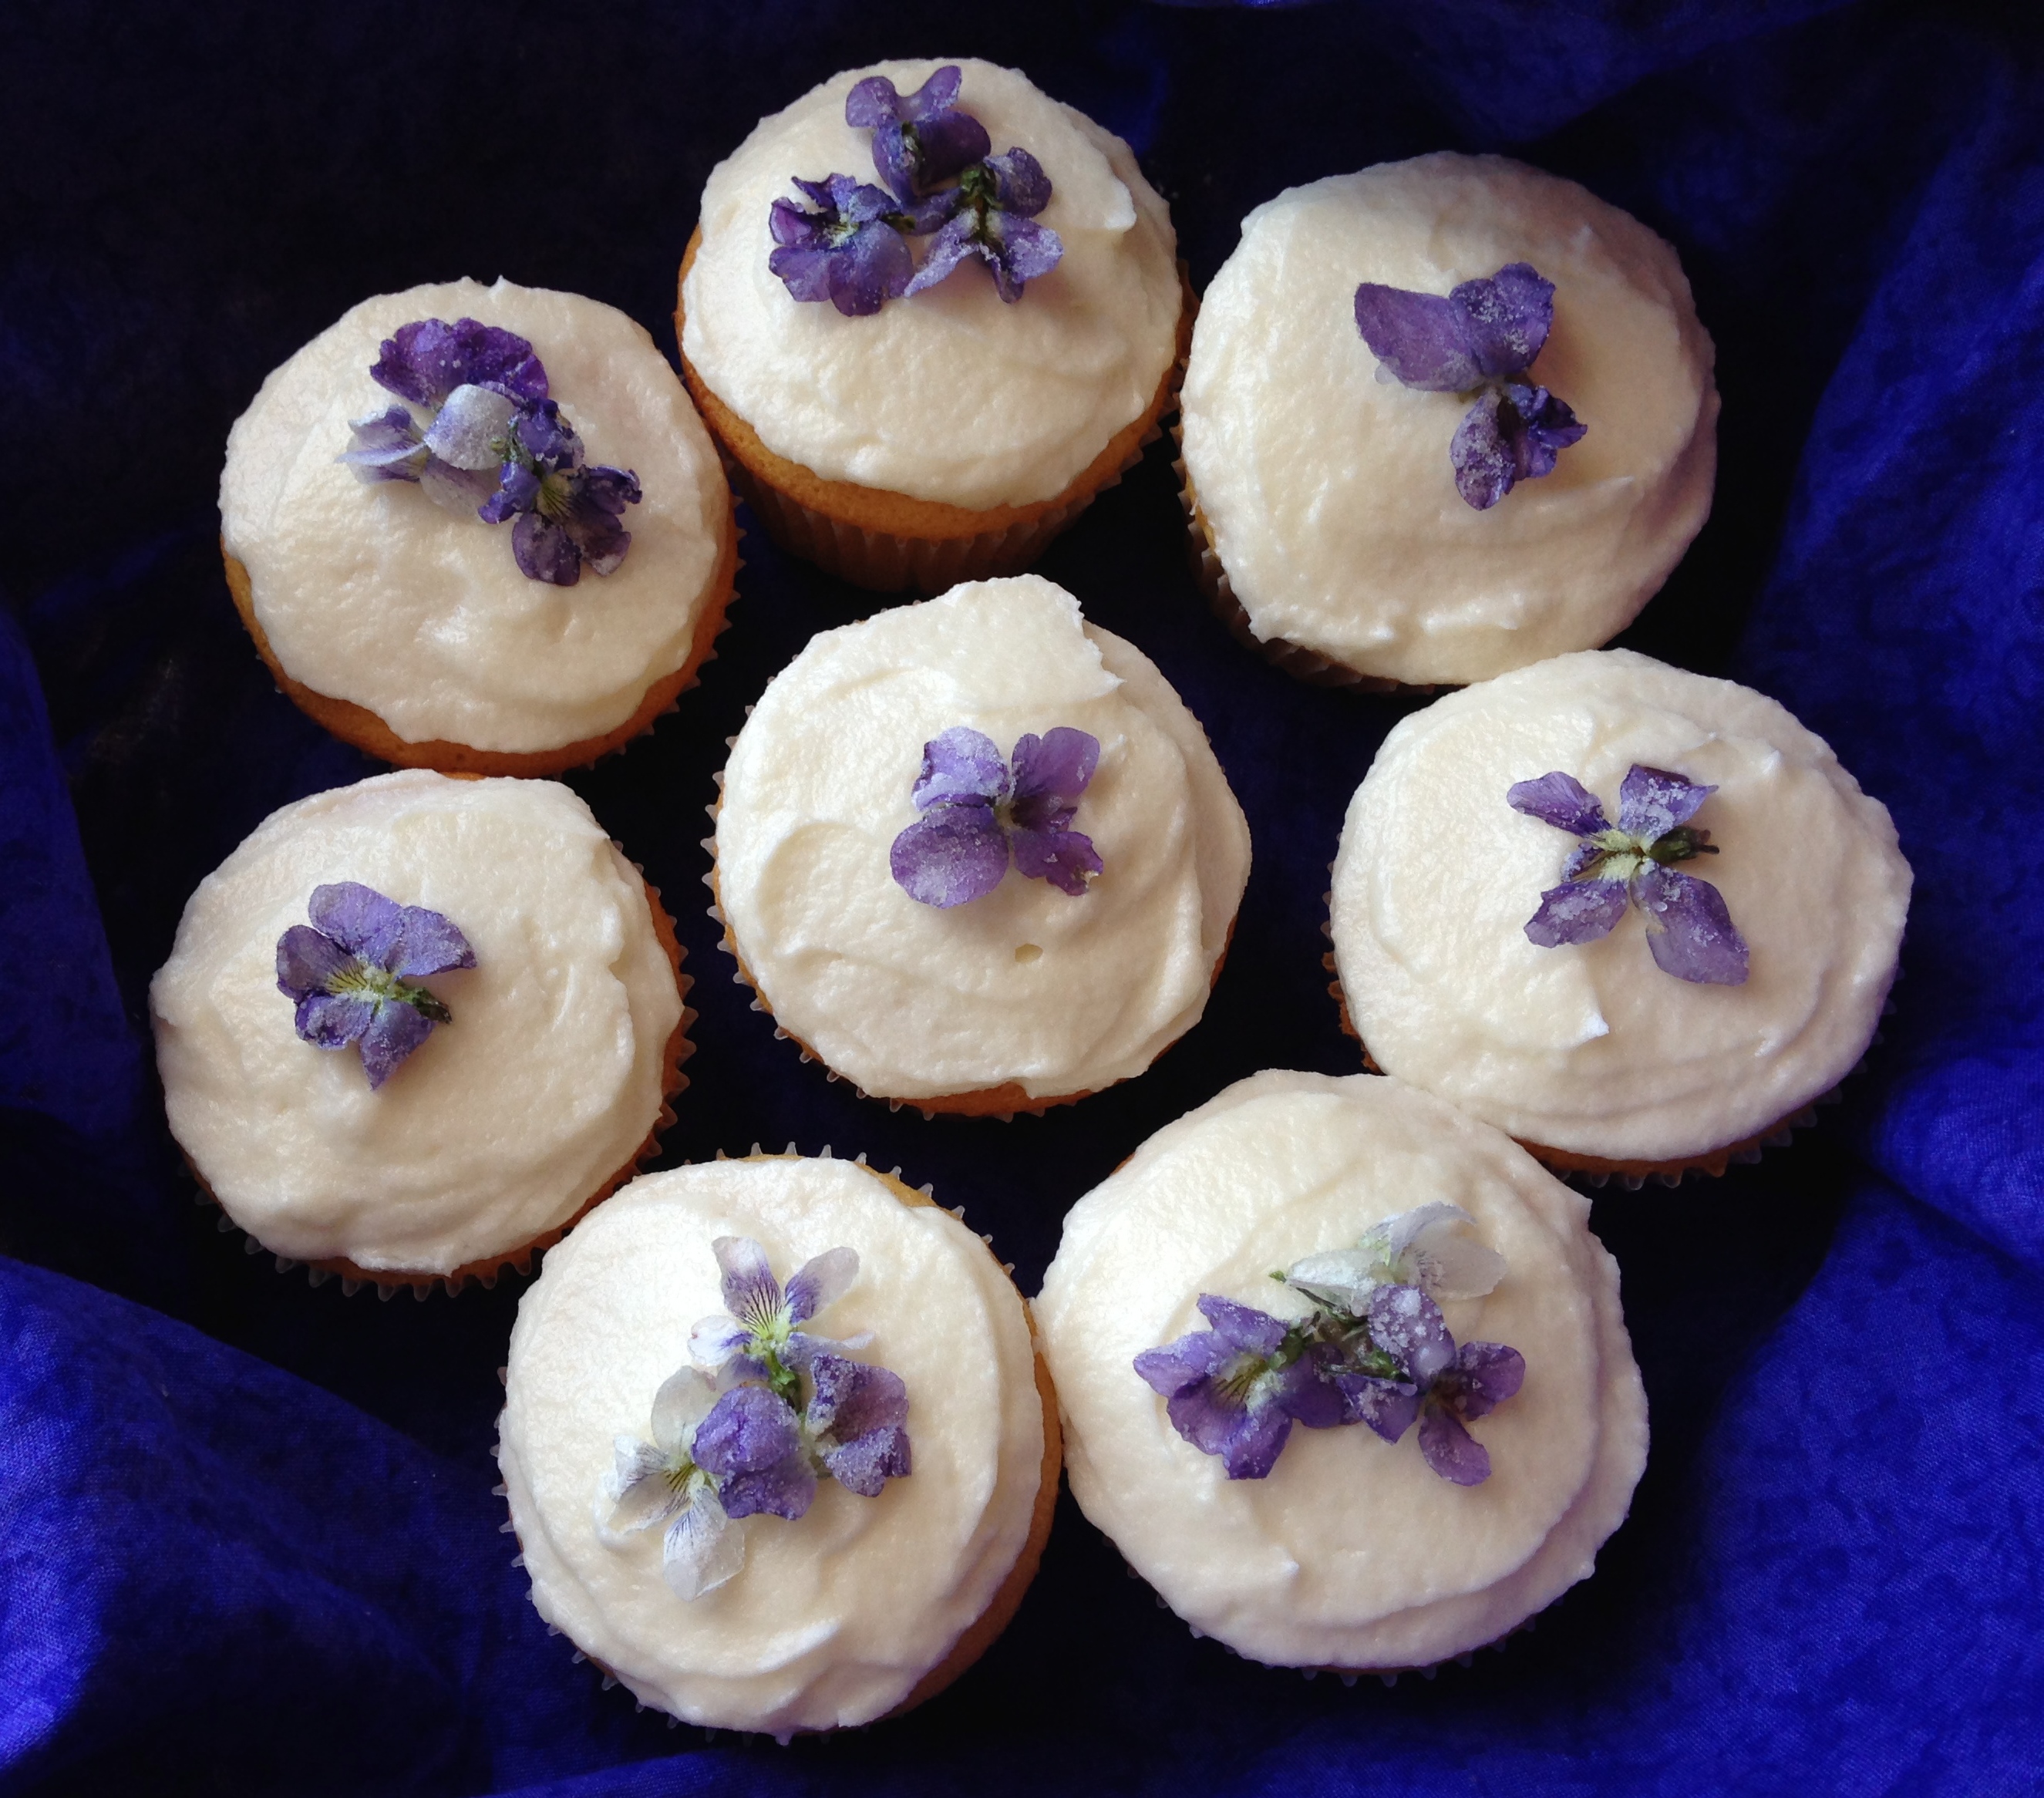
9. Let the violets dry overnight. When dry, you can use them as garnish or decoration, or just eat them. You can store them in airtight containers for later use. This is the first time I’ve had any leftover to store, so I don’t know how long they’ll last, but it should be at least three months and maybe longer.
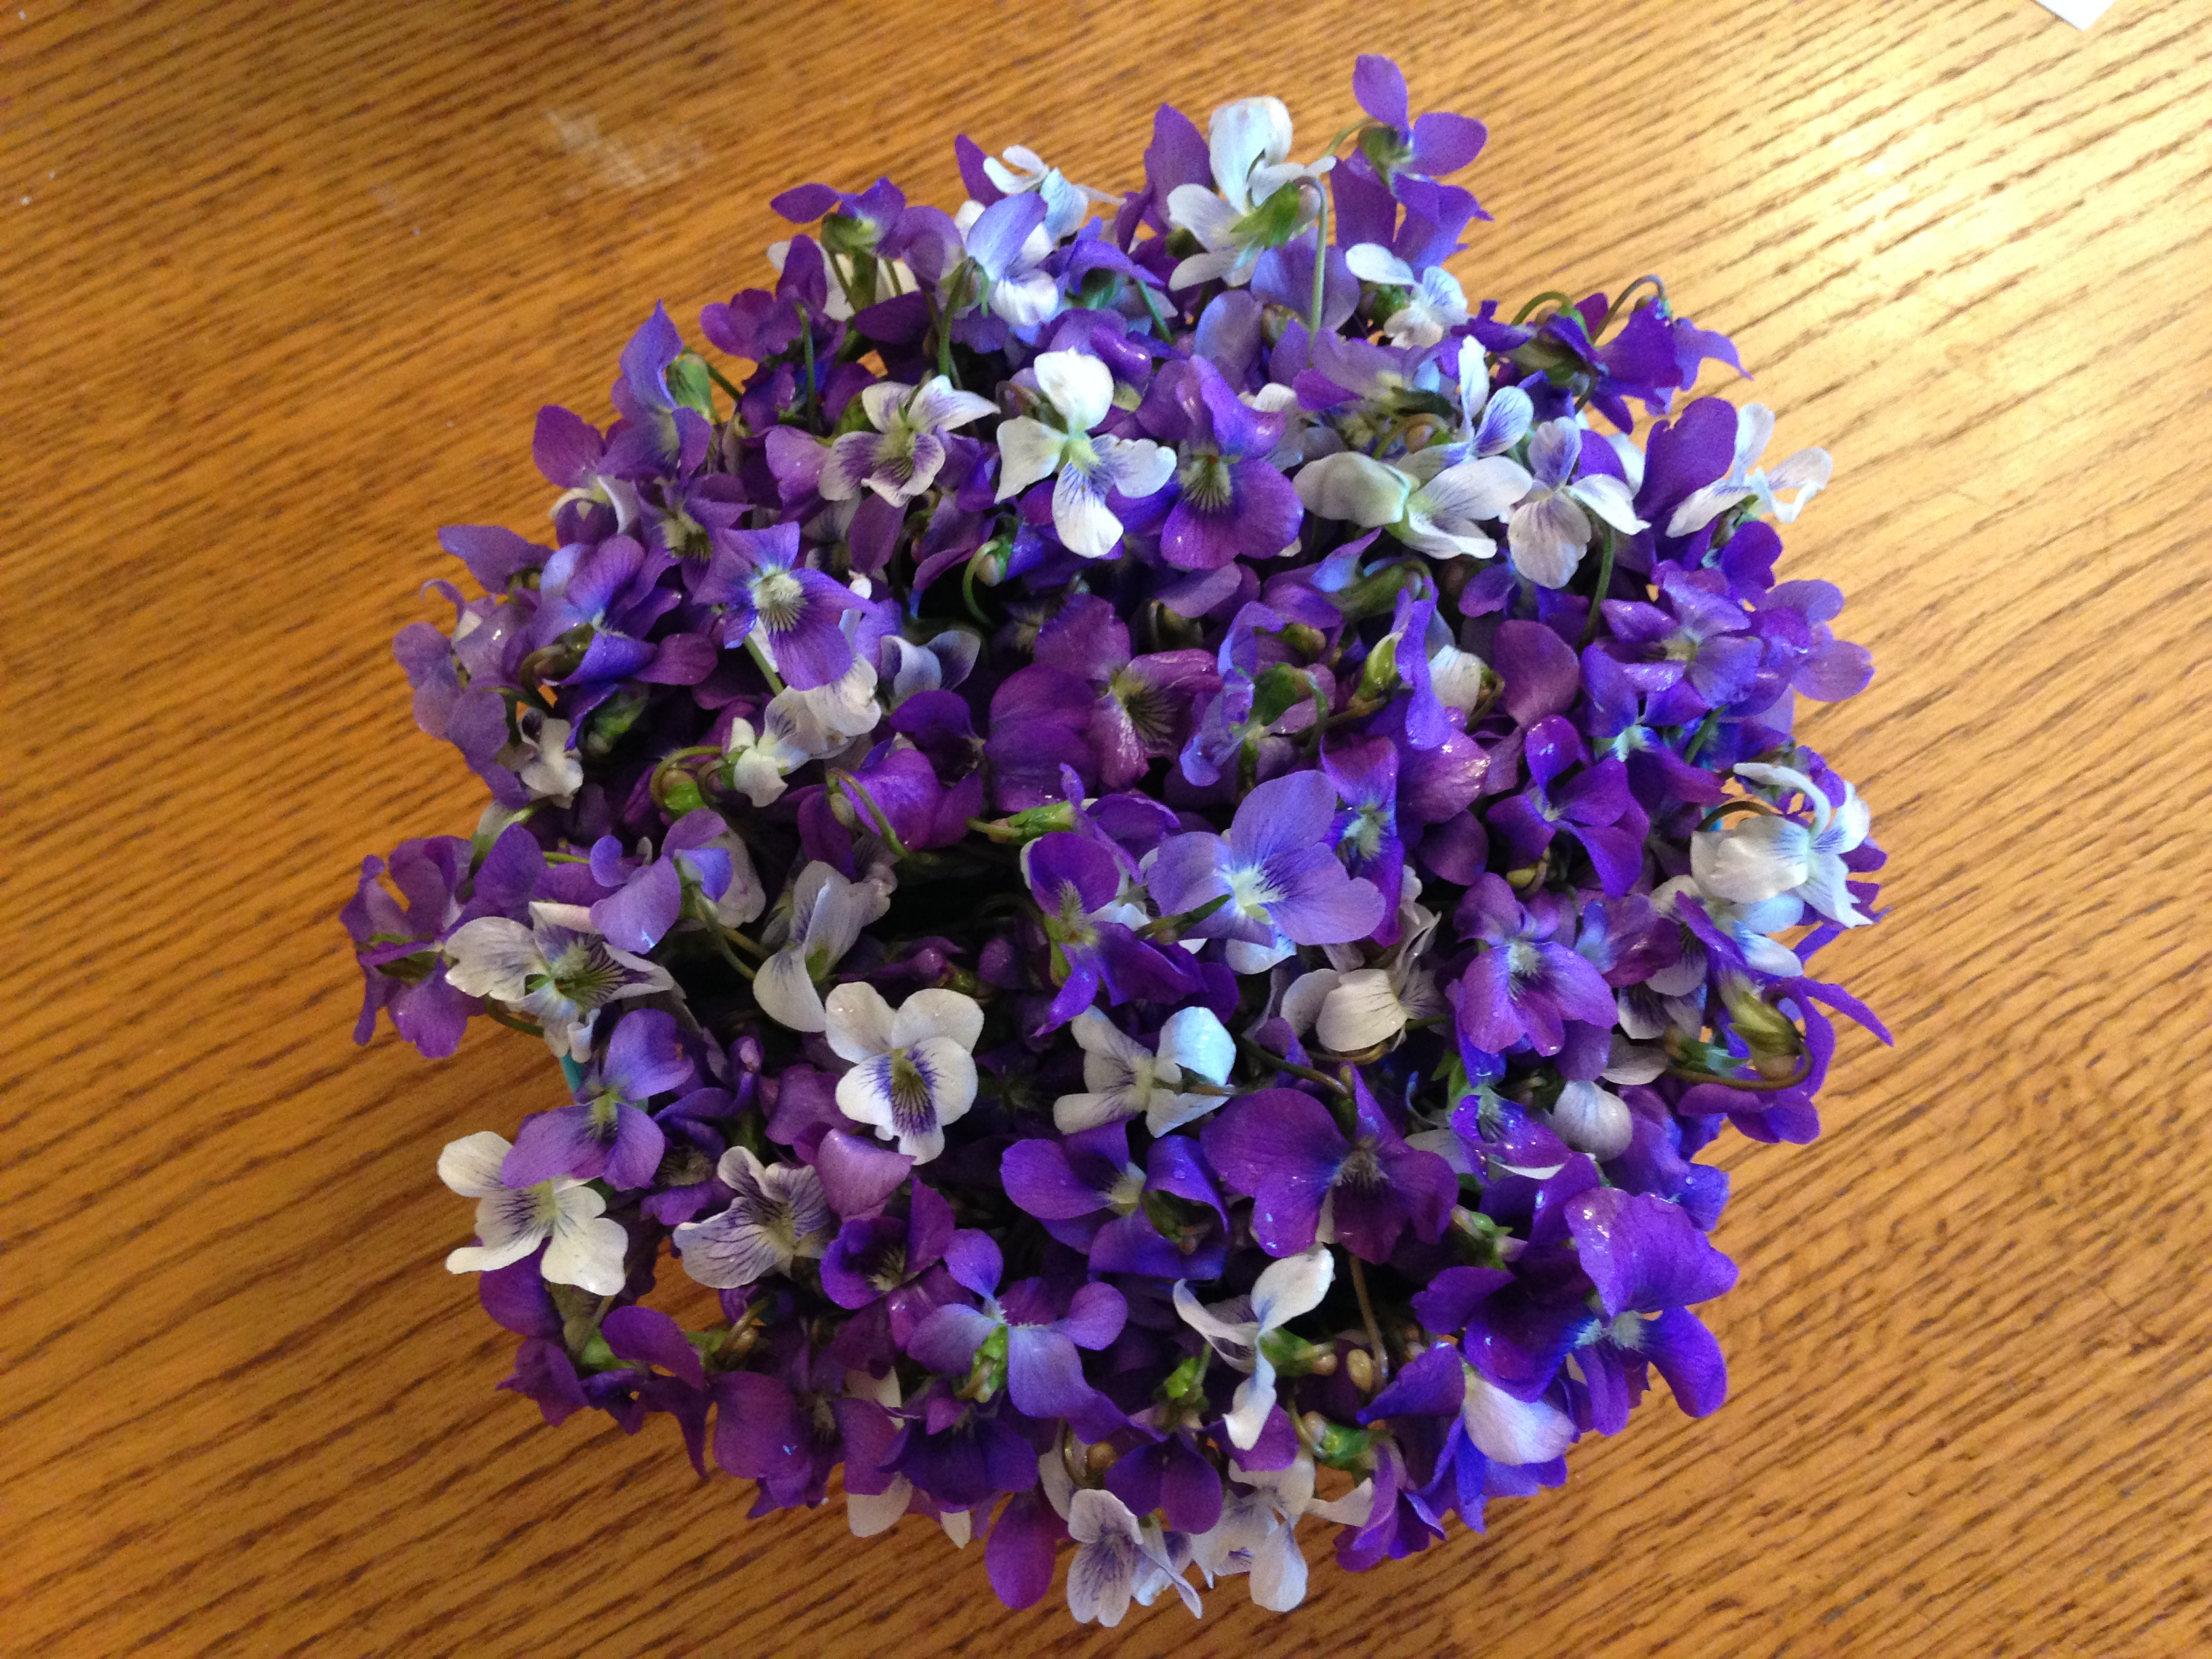
Three hours’ worth of violets!
What with my delay between picking the violets and sugaring them, and my trial-and-error learning process throughout the sugaring, it’s not surprising that I ended up with maybe a quarter of my original violet harvest actually looking decent. If you want to try making candied violets for the first time, I suggest you pick way more than you need, and don’t feel too disappointed if you end up with a lot of mistakes. Eat them and then show off all the prettiest ones to your friends. We’ll all get better with practice, I’m sure.

This is wonderful and sharing your learning process makes it a much more valuable lesson for everyone! Thanks.